Im sorry again for not posting for so long but hope this post is going to repay you all the missing dayz in this post you are going to learn how to hack a windows os to mac os completrely including skin,finder , apps and further more hope you enjoy
Note: Most of the following themes, skins and applications are for Windows XP, but they will also work on Windows Vista and Windows 7.
PART 1
VISUAL STYLER
For Mac OS X Leopard Theme on Windows, you have two options:
1. Mac OS X Visual Styler and True Transparency
2. WindowBlinds 7 (Recommended)
Mac OS X Visual Styler and True Transparency
For Windows XP:
For applying Mac OS X Theme through Visual Styler and True Transparency on Windows XP, you will be needed:
True Transparency with Mac OS X Leopard Theme running on Windows XP
Instructions:
- Run UXTheme Patcher before applying Mac OS X Leopard Visual Styler Theme, otherwise, the theme will not be installed. During patching, Windows XP may require XP Installation CD, DO NOT INSERT THE XP INSTALLATION CD, OTHERWISE, THE UXTHEME PATCHER WILL FAIL TO PATCH.
- Restart your computer
- Now unzip the Mac OS X Leopard Visual Styler Theme folder and copy the folder to “C:\Windows\Resources\Themes” (the default folder for VS); and
- Then apply Mac visual styler
- Now unzip the downloaded True Transparency folder to “C:\Program Files” folder, and then run True Transparency
- Now unzip the downloaded Mac OS X Skin for True Transparency folder and copy it to “C:\Program Files\(True Transparency folder)\skin” folder
- Now right click True Transparency icon in the status bar, then click Skins and then click Leopard skin. Your present Aero TT skin will be changed to Mac skin
For Windows 7:
For applying Mac OS X Theme through Visual Styler and True Transparency on Windows 7, you will be needed:
-
-
- Instructions are inside the zipped folders.
WindowBlinds 7 (Recommended)
WindowBlinds 7 is a third party freeware for applying Mac OS X theme and other interesting themes on XP. MSStyler Theme is not a perfect match of Mac Leopard, many of the visual features are missing, for e.g., the close, minimize and restore buttons are given on right hand side of title bar, instead of left hand side; menus and taskbar are not transparent; etc. WindowBlinds gives you almost a 100% result in changing the looks of windows to Mac OS X Leopard. Besides this, you can also add transparency effects to your windows and change the colors of the windows (only in full version). And most important, you don’t have to play with your Windows XP/7’s original files.
For applying Mac theme on XP/7 through WindowBlinds, you will be needed:
WindowBlinds 7 with Mac OS X Leopard Theme running on Windows XP
Instructions:
- Install WindowBlinds first, and
- Then install Mac OS X Leopard WB Theme.
FINDER FOR WINDOWS
For Windows XP:
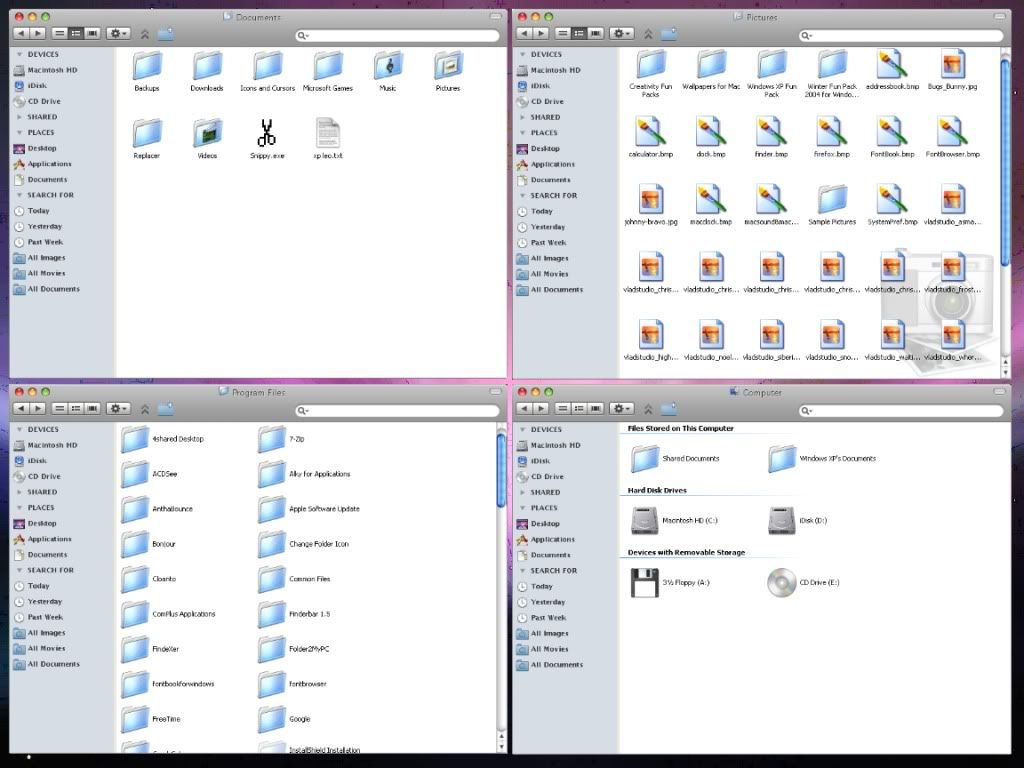
Windows Explorer looks like Mac OS X Leopard Finder
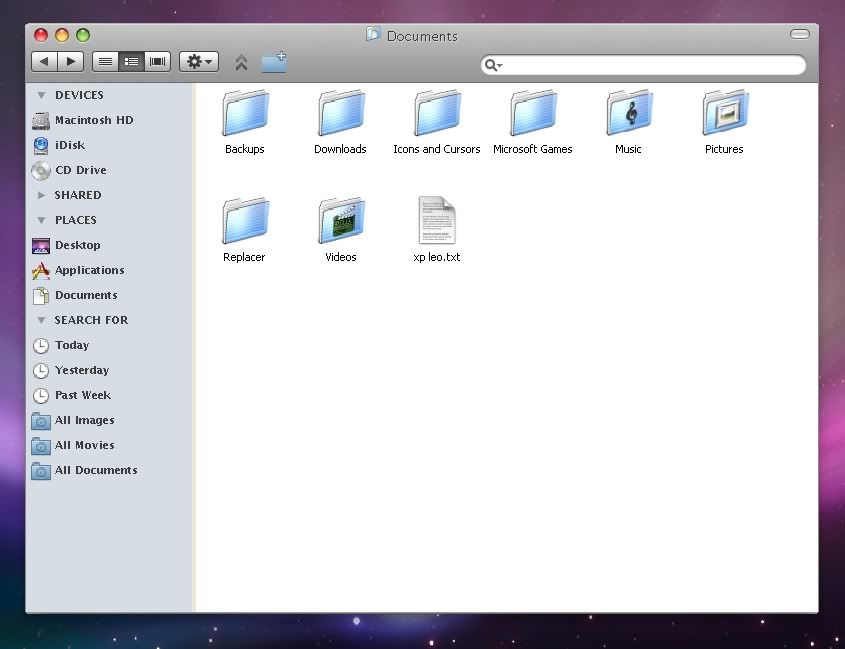
Let’s take a look at Finder first. What Finder is? Finder is a Windows Explorer like application for Mac. It has a toolbar and a search bar. A slim menu bar is always appeared on the desktop, whether the Window is opened or not. To see which version of Finder you are using, click Finder and then click About Finder.
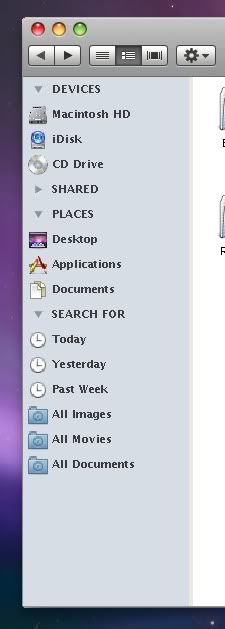
In the left hand side of the Finder (Window), you will see shortcuts to different places on your computer, for e.g., Macintosh HD (Local Disk), iDisk (Second Hard Disk), Documents, Applications (Programs), etc.
To give the look of Mac’s Finder to Windows Explorer, you will be needed:
Styler Toolbar
Mac OS X Leopard Toolbar
Mac OS X Leopard Inspired Toolbar
Mac OS X MobileME Toolbar
Findexer
Instructions:
- Install Styler Toolbar
- Now unzip the downloaded Mac OS X Leopard’s Finder Toolbar Skin for Styler, and copy the folder to “C:\Program Files\Styler\TB\skins\Styler’s” folder
- Now run Styler from Start Menu and apply the Leopard theme in Toolbar tab
- Check Hide Menu Bar (Explorer)
- Now install Findexer (as per the instructions given in the downloaded compressed folder), and then restart Windows to see the changes
- Now unzip the Mac OS X Leopard Findexer Icons + Installation Instructions and follow the instructions for changing icons, fonts and colors of Findexer, in order to make it look like Mac OS X Leopard.
FINDER PREFERENCES
You can get the Mac OS X Finder Preferences clone on Windows XP / 7. Although it's not functional but will give you can exact look of the original.
Instructions:
Unzip the folder and copy the unzipped folder "Menu Bar" to C:\Program Files;
You can create a shortcut in the Findexer's left side pane of the Explorer or anywhere else you want.
FINDER MENU BAR
There are many software that provides Finder Menu Bar for Windows XP and Windows 7, but I found this one most suitable one for my computer:
Note:
Finder Menu Bar will replace your Taskbar, you will not be able to switch between different windows in the way as you usually do in Microsoft Windows. For switching between different windows, click Windows to see different windows in the list, or use Alt-Tab button on your keyboard.
If you want to access your Start Menu while using Finder Menu Bar, just click Window logo button on your keyboard.
MAC OS X DIALOGS AND INTEGRATED ICONS (LEOPARD MODS FOR WINDOWS)
For Windows XP:
To change overall looks of Windows XP icons and dialogs to that of Mac OS X, you will be needed to replace the following patched files with the original files:
By replacing these patched files with the existing original XP files, the entire OS environment is changed, namely, folder icons, program icons, my computer icon, network neighborhood icon, right click taskbar properties, about windows dialog, copying/moving/deleting progress animations, replacing dialogs, etc.
But BE CAREFUL, MAKE SURE THAT YOU HAVE BACKUP ALL THE ORIGINAL FILES IN A SAFE PLACE ON HARD DRIVE BEFORE REPLACING. To replace these patched files with the original ones you will be required to download Replacer and Windows File Protection Switcher.
Instructions:
1. 1. Run WFP Switcher. Window may give file protection error, ignore it. DO NOT INSERT YOUR ORIGINAL XP CD, OTHERWISE, WFP SWITCHING CANNOT BE EXECUTED. After finishing with WFP Switch, restart your computer.
2. 2. Replace the following Patched Files with the originals using Replacer:
"mydocs.dll", “shell32.dll”, “msgina.dll” and “xpsp2res.dll”
I. Run Replacer, a command prompt window will be open;
II. Drag and drop your original "*.dll" from "C:\Windows\system32" folder on Replacer's open window and press enter;
III. Then drag and drop patched "*.dll" on Replacer open window and press enter;
IV. Replacer will ask you whether to replace the file. Press Y and enter;
V. Replacer will take a few second and your file will be replaced.
"explorer.exe"
I. Close all the running applications on Windows;
II. Right click taskbar and click Task Manager;
III. Click Processes, then right click "explorer.exe" and click End Process. All the icons and taskbar and even sidebar will be gone;
IV. Now click File in Task Manager and click New Process;
V. Click Browse;
VI. Now go to the folder where the patched "explorer.exe" is located and copy it to "C:\Windows" folder. Windows will ask you whether to replace the existing file. Click Yes. Thus in this way, you can easily replace patched "explorer.exe" with the original "explorer.exe" without even using Replacer. Make sure that "explorer.exe" is not running, otherwise, it will not be replaced;
VII. Now restart your computer;
VIII. You may notice that some icons have changed to Vista icons and some do not. Create a new user account in Control Panel => User Accounts. Logoff your present User Account and then Logon the newly created User Account. You will notice that all the old-looking XP icons have been change to Vista icons.
“*.cpl”
I. Run Replacer, a command prompt window will be open;
II. Drag and drop your original "*.cpl" from "C:\Windows\system32" folder on Replacer's open window and press enter;
III. Then drag and drop patched "*.cpl" on Replacer open window and press enter;
IV. Replacer will ask you whether to replace the file. Press Y and enter;
V. Replacer will take a few second and your file will be replaced.
For Windows 7:
To change overall looks of Windows 7 icons and dialogs to that of Mac OS X, you will be needed to replace the patched files zipped in a folder with the original Windows 7 files.
ALTERNATIVE MAC NAMES FOR WINDOWS FOLDERS
Rename the following to match with Mac OS X:
My Computer = Owner’s Name or Computer’s Name
-
-
-
-
Local Disk (C:\) = Macintosh HD
Other Local Disk (D:\) = iDisk
-
DO NOT RENAME THE MAIN SYSTEM FOLDERS, i.e., WINDOWS, PROGRAM FILES and DOCUMENTS AND SETTINGS, OTHERWISE YOUR SYSTEM WILL NOT RUN.
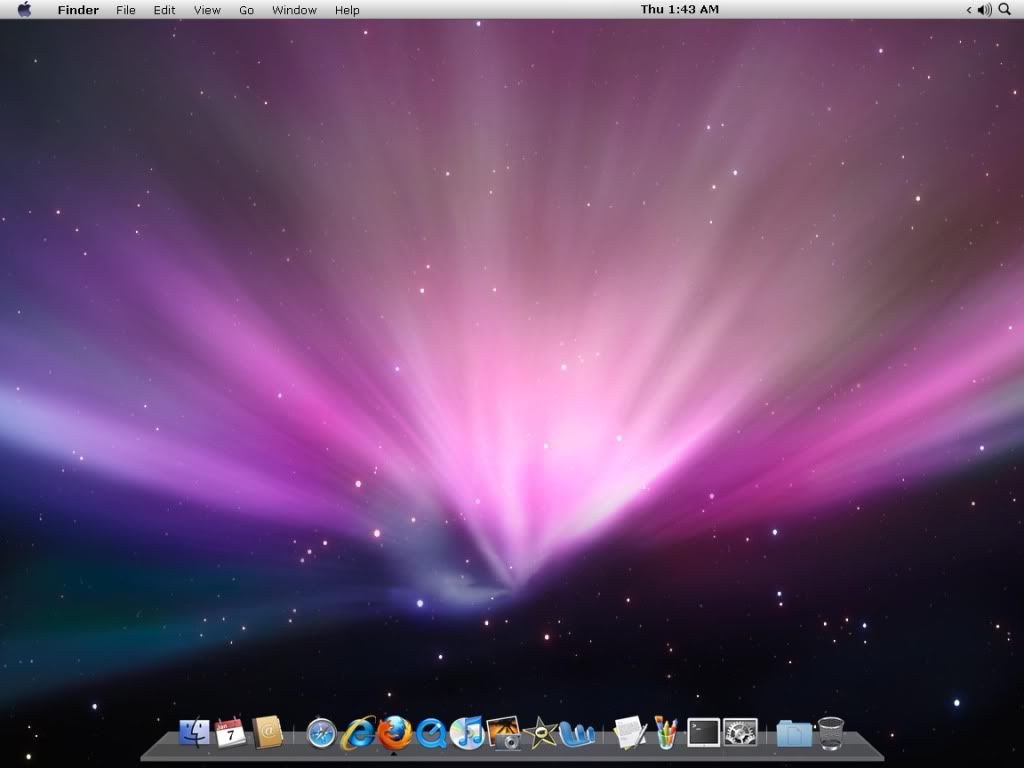
DOCK
The dock is your shortcut bin where you can get to the programs you use most often. It also shows icons of all the programs you are running. It is a very important and perhaps the most powerful thing for a Mac user. It works like Taskbar for Mac. For more information on Mac Dock basics, click here.
In Windows XP/7, a Mac like Dock can be installed, which will perform all the basic functions of a Mac Dock. For installing Dock on XP/7, you have two options:
Stardock’s ObjectDock
RocketDock (Recommended)
Stardock’s ObjectDock
Stardock’s ObjectDock is a freeware. Some of the features are disabled in Free Version, and it has a trial period of only 30 days. Besides this, it utilizes your computer resources more than RocketDock. Although it has more features and functions than RocketDock.
Stardock's ObjectDock
Instructions:
- Install and run ObjectDock first,
- Now unzip the Mac OS X Leopard Skin for ObjectDock folder, and copy it to “C:\Program Files\Stardock\ObjectDock\Backgrounds\Tabbed” folder
- Now right-click Dock, then click Dock Settings, then click Appearance tab, then select OS X Leopard from the menu under Background, and then click OK
RocketDock (Recommended)
Although the Stardock’s ObjectDock is of a high-quality application, but some of its features are disabled and it also takes too much of your computer memory. On the other hand, RocketDock is a software which is 100% free to install, and which does not take too much of your computer’s RAM.
- Install and run RocketDock first,
- Now unzip the Mac OS X Leopard Skin for RocketDock folder, and copy it to “C:\Program Files\RocketDock\ Skins” folder
- Right click the dock and click Dock Settings
- Now click Style, you will see a list of themes installed
- Now click Mac OS X Leopard and click OK
Dock Enhancements
Icons
Stardock’s ObjectDock
- Unzip the Mac OS X icons for Dock folder, and copy it to “C:\Program Files\Stardock\ObjectDock\Bundled Images” folder
- Now right click the icon on the dock, for example: My Computer, and click Dock Entry Properties
- Now click Change Image
- Select the icon in the Images box, and click OK
RocketDock
- Unzip the Mac OS X icons for Dock folder, and copy it to “C:\Program Files\RocketDock\Icons” folder
- Now right click the icon on the dock, for example: My Computer, and click Icon Settings
- Select the icon in the Icons box, and press OK
Note:
If you have already replaced the patched files with the original files, i.e., “mydocs.dll”, “shell32.dll”, and “explorer.exe”, you don’t have to install icons for system folders and files. However, certain programs’ icons can be changed, for example:
Windows Movie Maker = iMovie icon
ACDSee / Picasa = iPhoto icon
Notepad / WordPad = Text Edit icon
Windows’ native Address Book (could be found in Accessories) = Address Book icon
Command Prompt = Command Prompt icon
Control Panel = System Preferences icon, etc.
All these icons are included in this compressed folder.
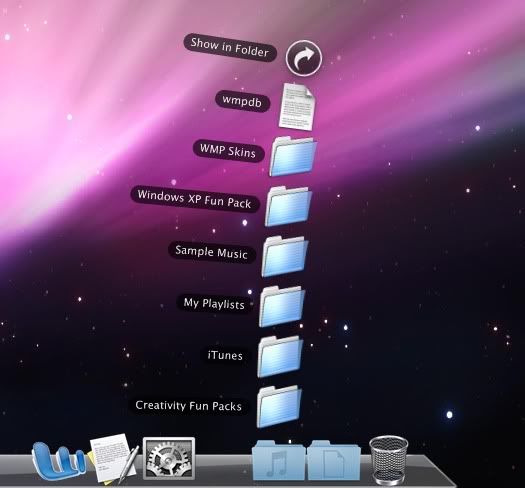
Stack Docklet
Stardock’s ObjectDock
- Download the Stack Docklet for Stardock ObjectDock, unzip the folder, and copy it to “C:\Program Files\Stardock\ObjectDock\Docklets” folder
- Now right-click the Dock, click Add, and then click New Stack Docklet. A new empty icon, namely Stack, will be appeared on the Dock.
- Click the empty icon. A small window will be opened.
- Now select any folder, lets say: My Documents
- Then select an appropriate icon for the folder, and then click OK
StackDocklet for Stardock's ObjectDock
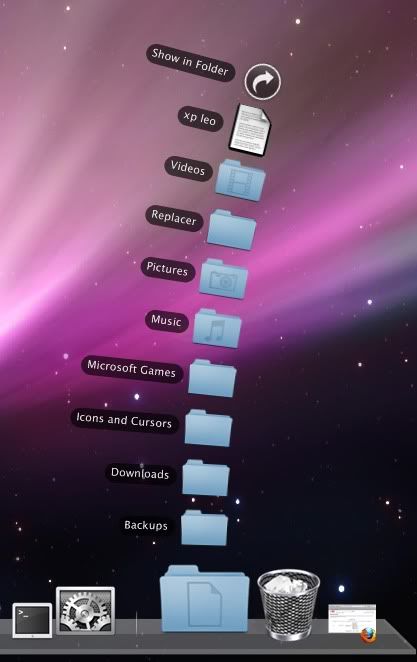
RocketDock
- Download Stack Docklet for RocketDock, unzip the folder and copy it to “C:\Program Files\RocketDock\Docklets” folder
- Now right click the dock, click Add Item, and then click Stack Docklet. A new empty icon will be appeared Dock.
- Now right click the empty icon, and click Icon Settings. A small window will be opened.
- Now select any folder, for example: My Documents.
- Then select an appropriate icon for the folder, and then click OK.
StackDocklet for RocketDock
iCal (Docklet)
iCal is a small calendar showing current day, week, month and year on the Dock. It’s a very handy docklet for everybody.
Stardock’s ObjectDock
iCal is included in the Stardock’s ObjectDock by default. Just right click the dock, then click Add, and then click New Calendar Docklet
RocketDock
- Download iCal Docklet for RocketDock , unzip the folder, and copy it to “C:\Program Files\RocketDock\Docklets” folder
- Now right click the dock, click Add Item, and then click iCal.
DESKTOP ENHANCEMENTS
Tweak UI (For Windows XP)
Now you have to hide My Computer, My Documents, Network Neighborhood, Internet Explorer and Recycle Bin icons from the desktop. To remove these icons, right click desktop, click Properties, click Desktop tab, click Customize Desktop, then uncheck all the icons and press OK. Now the Recycle Bin has been left to remove. Microsoft has created a program which is used for tweaking Windows XP, i.e., Tweak UI Power Toy. It is just a 147 KB sized program, which can do a lot of tricks with your XP, including removing Recycle Bin from desktop.
Instructions:
- After installing Tweak UI, run the program
- Click Desktop in the left hand pane of the opened window
- Uncheck Recycle Bin
- Click OK
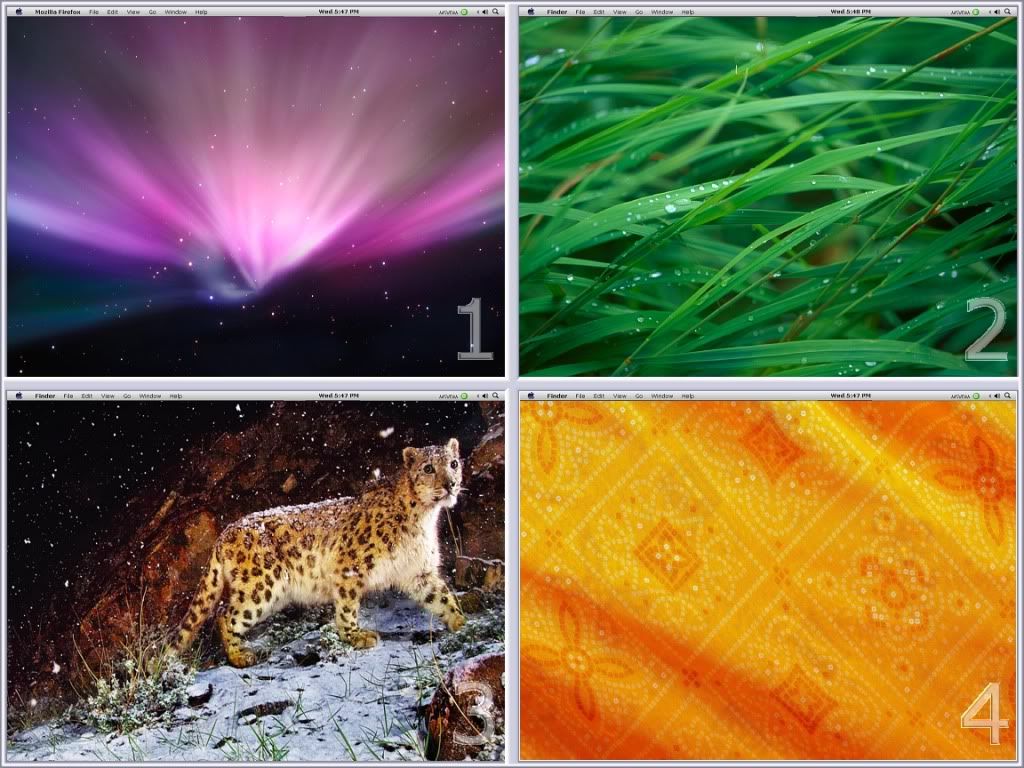
Wallpapers
Instructions:
Copy all the wallpapers to “C:\Windows\Web\Wallpapers” folder
Screensavers
Instructions:
Copy all the screensavers to “C:\Windows\system32” folder
Note:
Some of these screensavers are in *.exe file formats, therefore the Desktop Properties wont show it in the screensavers list. You have to manually start the screensavers from “C:\Windows\system32” folder.
Fonts
You can view a list of all the Mac OS X Leopard fonts at Apple’s website here.
Instructions:
Copy all the fonts to “C:\Windows\Fonts” folder
Cursors
Instructions:
Copy all the cursors to “C:\Windows\Cursors” folder
Sounds
Instructions:
Copy all the sounds to “C:\Windows\Media” folder
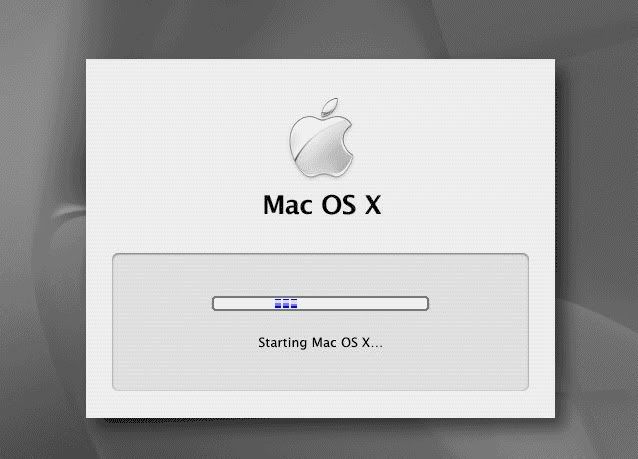
BOOT SKIN
For Windows XP:
You can also install Mac OS X Leopard Boot Skin on your XP. But you have to install Stardock BootSkin for applying Mac OS X Leopard boot skin.
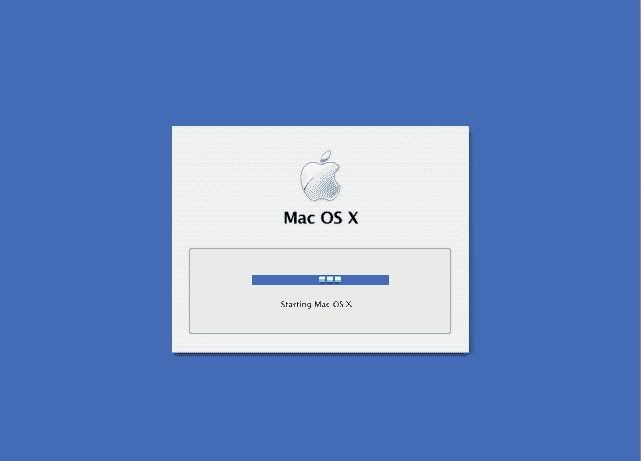
Mac OS X Snow Leopard Boot Screen for Windows 7:
 |
| Mac OS X Snow Leopard Boot Skin for Windows 7 |
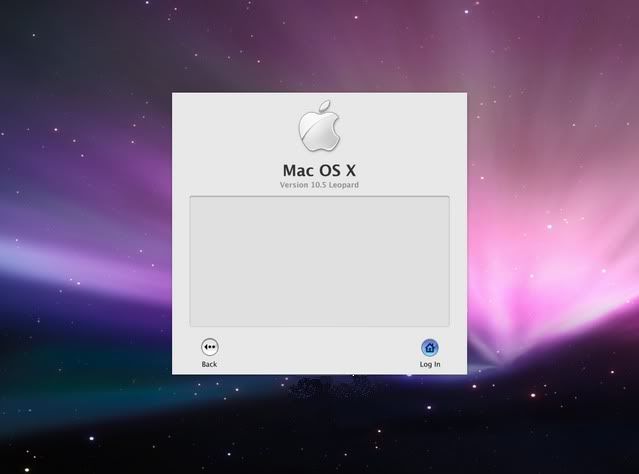
LOGON SCREEN
For Windows XP:
You can also install Mac OS X Leopard Logon Screen on Windows XP. But you have to install Stardock LogonStudio or TuneUp Utilities for applying Mac OS X Leopard logon screen.
Mac Logon Screen
PART 2
EXPOSÉ and SPACES
Exposé:
Exposé is perhaps one of the most famous features of Mac OS X. It is a windows management tool. Through Exposé, a user can quickly locate an open window, or hide all windows and show the desktop without clicking through many windows to find a specific target. For more information on Exposé, click here. Install any one of the following:
AnthaBounce
A light weight software that enables Exposé feature on Windows.
Topdesk
A light weighted software but not much as compare to AnthaBounce. It has some other good features also.
AnthaBounce as Mac OS X Expose
Spaces:
Spaces is a virtual desktop management feature and an integral part of Mac OS X Leopard. Spaces enables users to create multiple virtual desktops suited to the unique needs or work habits of the user. For more information on Spaces, click here. Install anyone of the following:
Windows XP Power Toy – Virtual Desktop Manager
Spaces is similar to Windows XP Power Toy – Virtual Desktop Manager, so I have included the official Microsoft link to VDM. Download and install the application, it will give the same result as given by Spaces, and it does not even take too much of your computer’s RAM.
MySpaces
MySpaces is a heavy-weighted software for having Mac’s Spaces feature on Windows. Besides this it also requires .NET Framework 2.0 before its installation.
Microsoft Windows XP Powertoy - Virtual Desktp Manager as Mac OS X Spaces
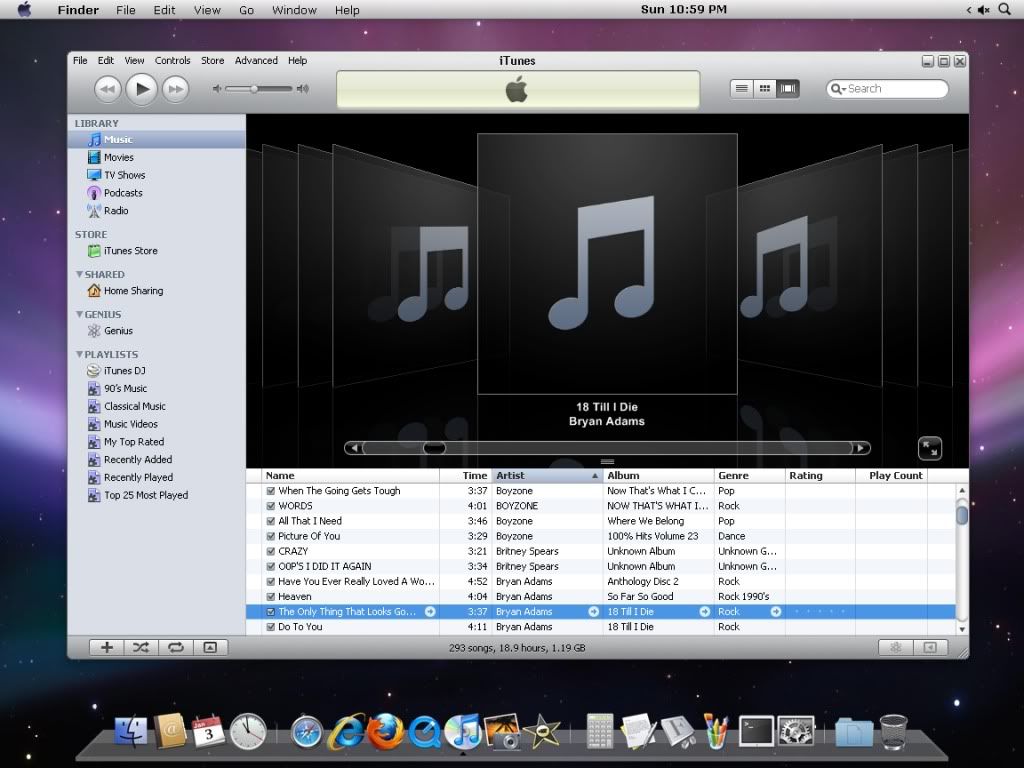
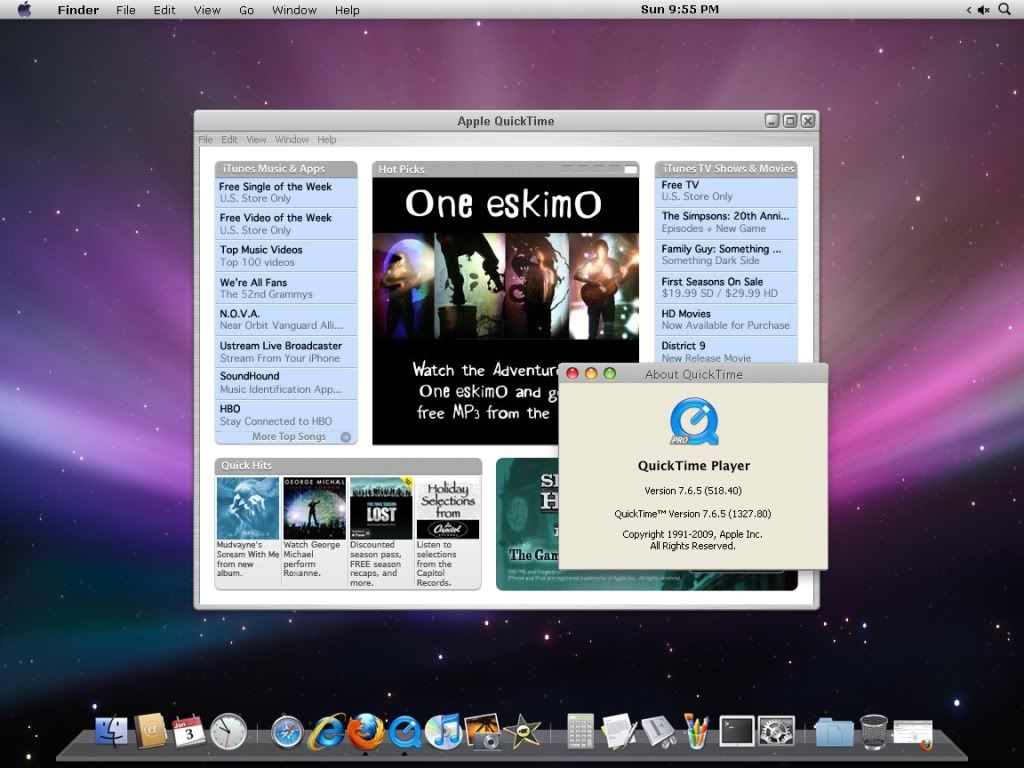
iTUNES and QUICKTIME PLAYER
iTunes, a substitute media player for Mac, is also available for PC at no cost. It plays all your digital music and video. It also syncs content to your iPod, iPhone and Apple TV. Like Windows Media Player, it has also a built-in media library, which stores your media on your computer or across network. Like iTunes, QuickTime Player is another media player developed by Apple. It is a light weighted media player as compared to iTunes. It can play a number of formats of digital video and audio and images. The Pro Version of QuickTime captures video and converts different media into a variety of formats. Both iTunes and QuickTime Player are must, if you are a big fan of Mac OS X.
iTunes
QuickTime Player
GARAGEBAND
GarageBand is an exclusive Mac OS X Leopard application that allows users to create music or podcasts. It is an ideal package for music lovers. For more information on GarageBand, click here. For Windows XP users, although Apple’s original GarageBand is not available, but you can get a better alternative for your OS, i.e., Accoustica’s Mixcraft. Mixcraft, like GarageBand, is a music editing application for Windows.
Accoustica’s other music related software:
PHOTOBOOTH
Photo Booth is an exclusive Mac OS X application used for taking photo snapshots and video clips with the built-in iSight camera in a Mac or other webcam. Photos and video clips taken with Photo Booth can be emailed, used as iChat icons or as photos for contacts in Address Book, or imported into iPhoto. It includes a number of effects that can be applied to photos. For Windows XP/y users, alternatives for Mac’s Photo Booth are:
SAFARI
No need for introduction. Just remember one thing, Safari won’t work with WindowBlinds. When you run Safari, the browser window will be shown in Windows’ native visual styler not in the WindowBlinds theme.
iPHOTO
iPhoto can import, organize, edit, print and share digital photos. It is designed to allow importing from digital cameras, scanners, picture CDs and the Internet. iPhoto is not available for Windows, but you have better alternatives to iPhoto, for e.g.: Google’s Picasa and ACDSee.
iMOVIE
iMovie is the video editing software shipped with Mac OS X Leopard. Like Windows Movie Maker, you can edit cut and copy the video clips, import and export movies, add text, pictures, music, etc. You can add special video effects also. You can use Windows Movie Maker as iMovie. The icon for iMovie is included in the Icons for Dock package.
iCAL (Application)
iCal is a hour by hour, day by day, week by week, month by month and even year by year planner or calendar. It is an essential feature of Mac OS X.
Download iCal
Instructions:
- Unzip the downloaded folder, copy the folder to C:\Program Files
- Create a shortcut in the Dock by just dragging and dropping the iCal.exe on the Dock.
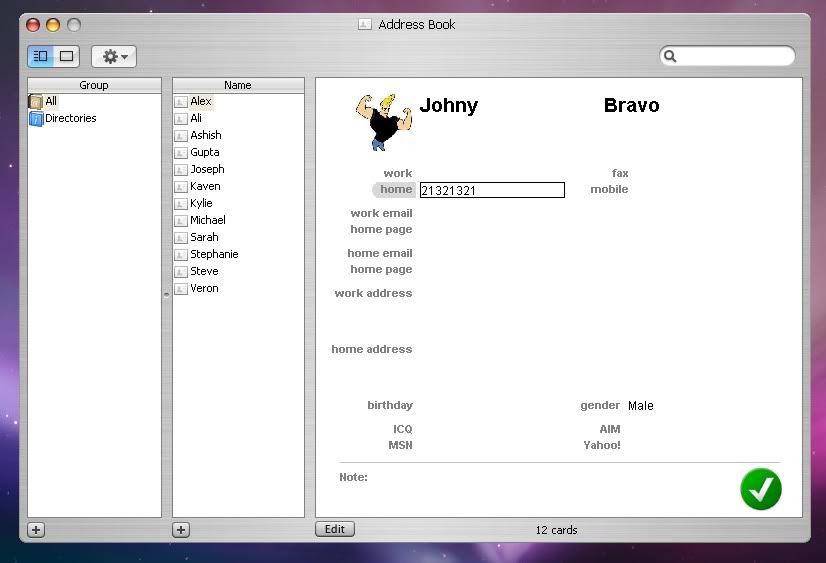
ADDRESS BOOK
Mac OS X Leopard’s Address Book is much more advanced address book as compare to Windows’ Address Book. You can also get a Mac’s Address Book clone for XP.
Note:
The Address Book icon is included in the Icons for Dock.
Address Book
Instructions:
- Unzip the downloaded folder, run the setup file
- Create a shortcut in the Dock by just dragging and dropping the AddressBook.exe on the Dock.
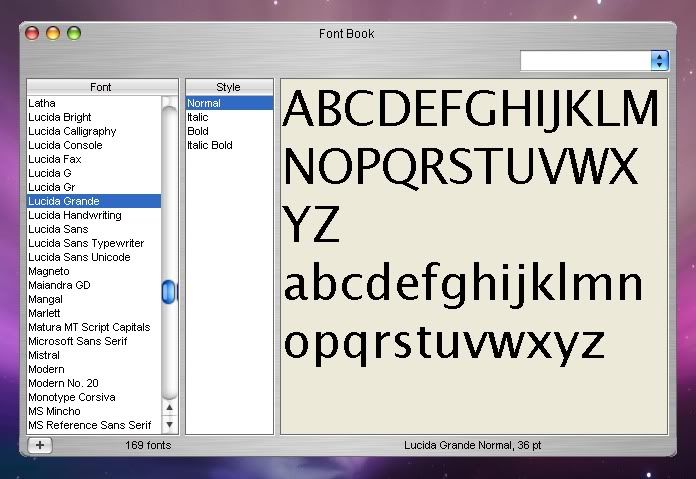
FONT BOOK
Font Book is a Mac OS X Leopard’s font manager. For more information on Font Book, click here. You can also get a Font Book clone for XP.
Note:
The Original Mac Font Book icon is included in the Icons for Dock.
Font Book
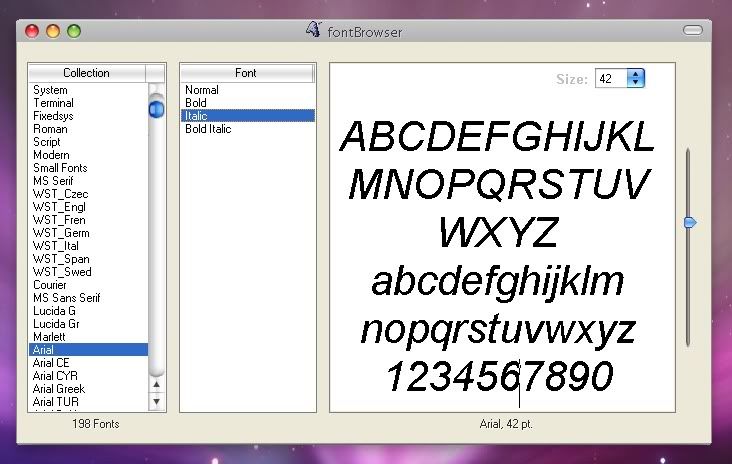
Font Browser
Instructions:
- Unzip the downloaded folder, and copy it in the “C:\Program Files”
- Now create a shortcut in the Start Menu
- And create a shortcut in the Dock by just dragging and dropping the Font Book.exe on the Dock.
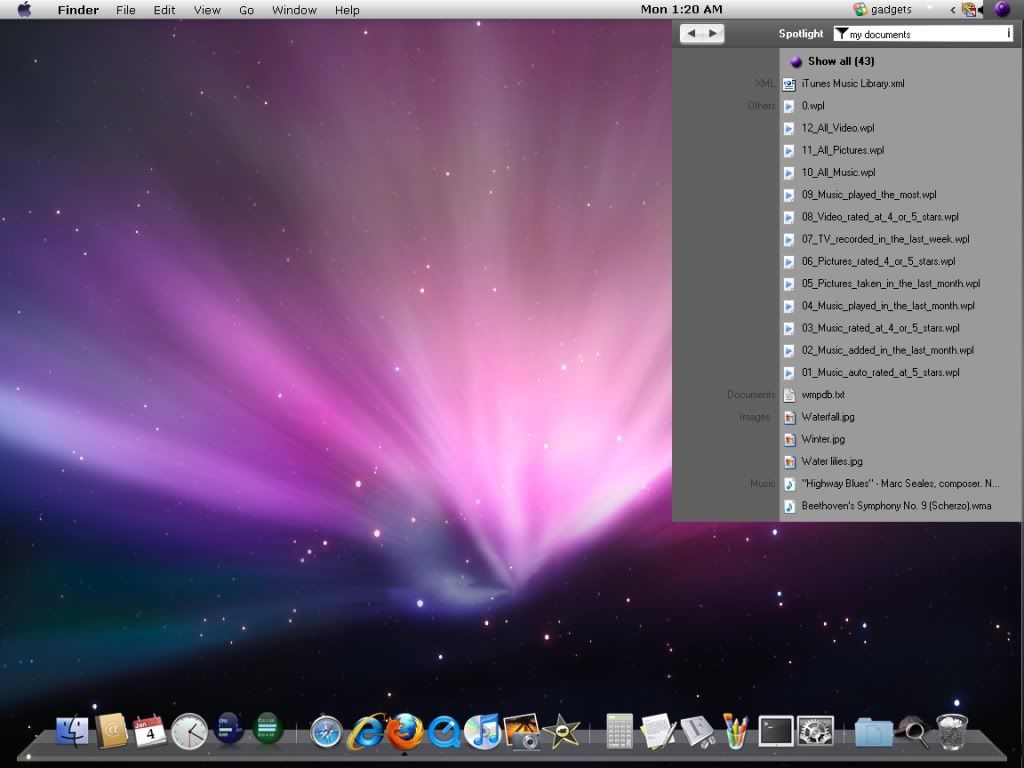
MAC SEARCH
Like Windows, Mac has also a searching tool, aka, iFind and Spotlight. You can get this feature on XP, but you have to install Google Desktop Search or Windows Search before installing iFind/Mac Search.
iFind & Spotlight
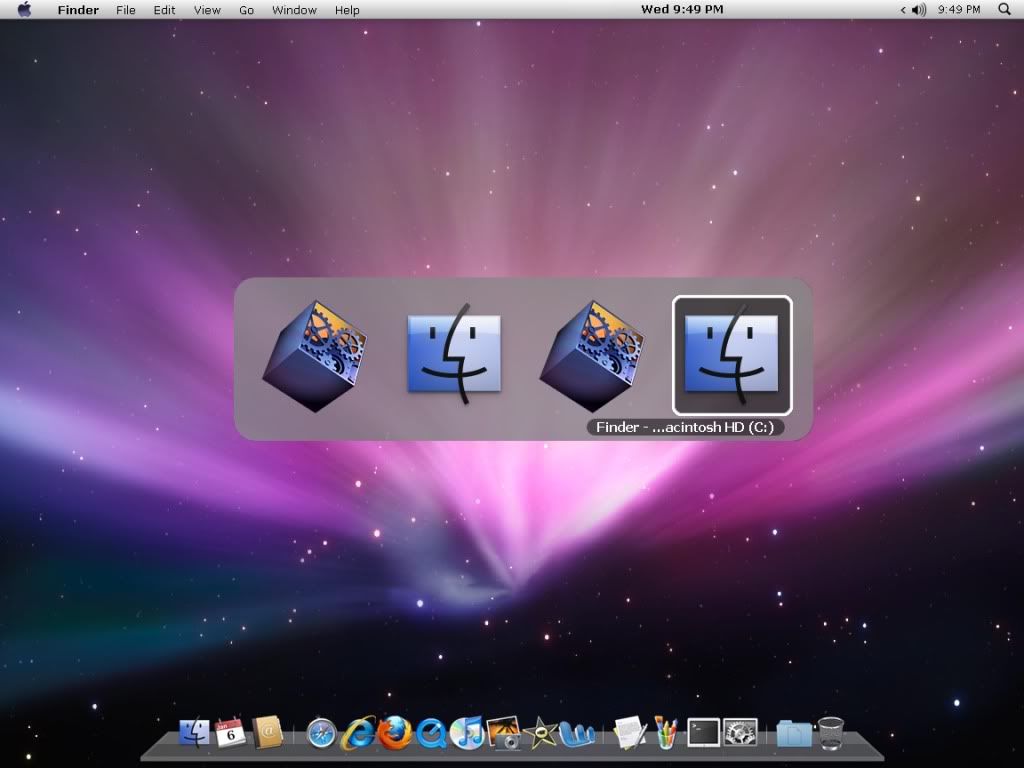
MAC SWITCH
Like Microsoft’s Alt-Tab Replacement Power Toy for XP, this little app can change the way you switch between Windows using Alt + Tab keys on keyboard.
Mac Switch (Alt-Tab Window Switcher)
CALCULATOR
If you want Mac OS X Calculator on Windows XP, you will be needed to download Euro Calculator and the Mac OS X skins for Euro Calc.
Mac Calculator
Instructions:
- Install the Calculator setup file
- Unzip the Mac OS X Skin for the Calculator and copy it to “C:\Program Files\Cloanto\Calculator\Skins” folder
- Now run the Calculator
- Click Options, then click Options, then click Skins tab, then click Jaguar Aqua Blue, and then click OK
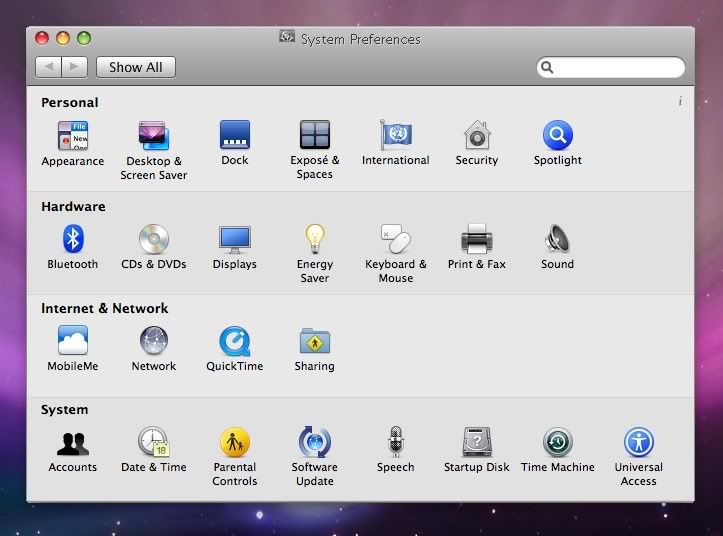
MAC SYSTEM PREFERENCES
Get the Mac like System Preferences on Windows XP. Its just a clone, you cannot do much with it.
CLOCK
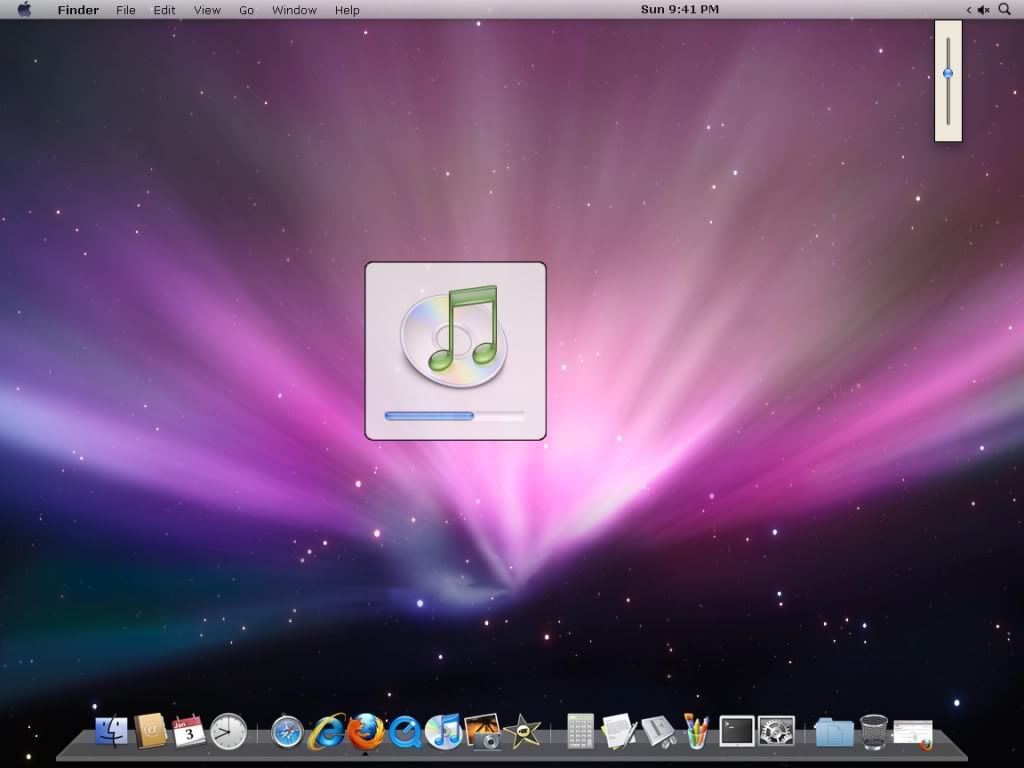
VOLUME CONTROL
Get the Mac volume control clone for XP. Install both Mac Sound and Mac Gadget.
Mac Volume Control
MAC GAMES
Well I have searched the whole Internet and couldn't find the exact clone of Mac Games. The following are the substitute games that can be found on Mac OS X Leopard, but they do not match with Mac in terms of their appearances. Give them a try, they are all light-weighted games.
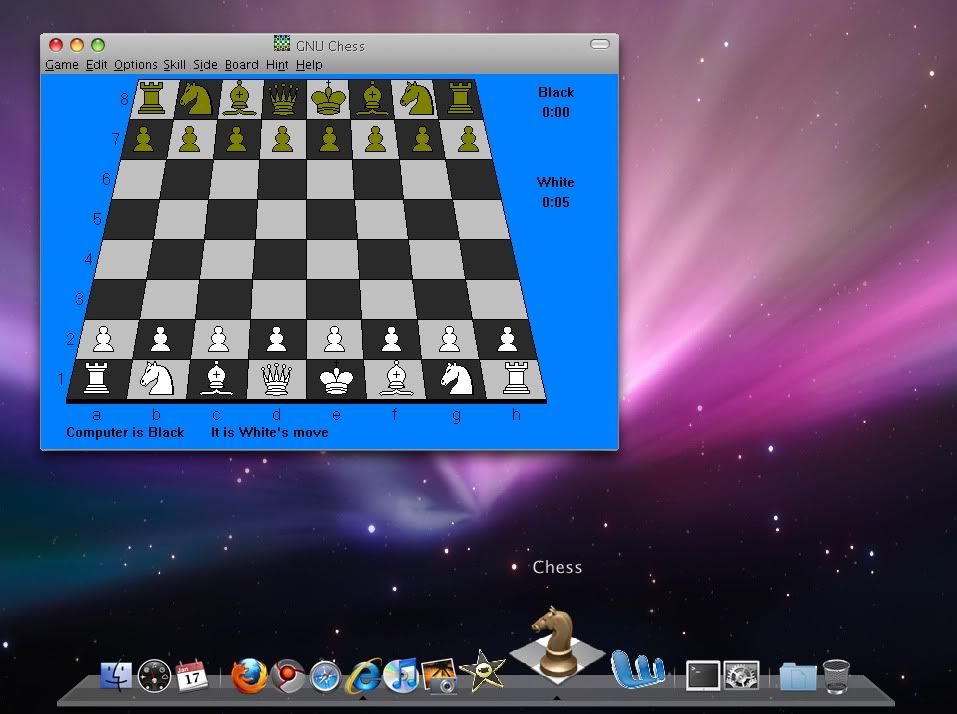
Chess
GNU Chess, a light-weighted program, actually designed for Linux. Its absolutely free.
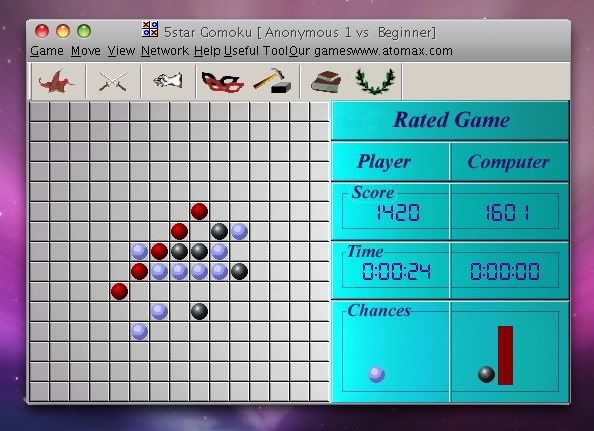
Gomaku
Attention Minesweeper and Reversi players! Mac OS X has a built-in game Gomaku for all you crazy fans of small strategy games. Now you can play it on XP machine also.
Download
Gomaku
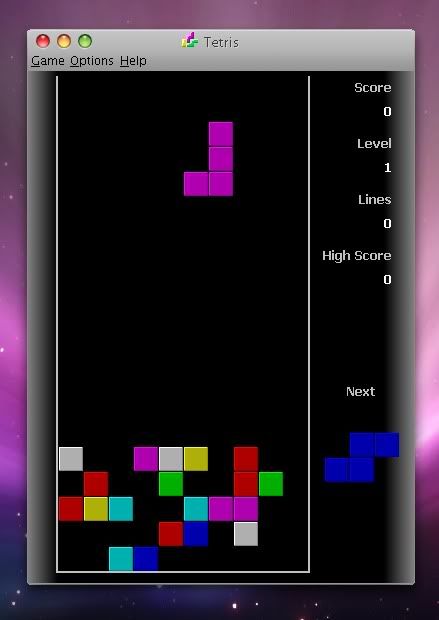
Tetris
A very old but very attractive and addictive game... Tetris.
A windows version of Tetris is available here: Tetris.
Angry Birds
Apple Mac Store recently featured a new game for Mac OS X, which has become very popular among Mac users. The Angry Birds developer has firstly introduced the game for Mac, and now they have released an official version for Windows for the first time. Download and enjoy playing this addictive multi-level game on Windows XP, Vista and 7:
Instructions:
Download and simply install the software.
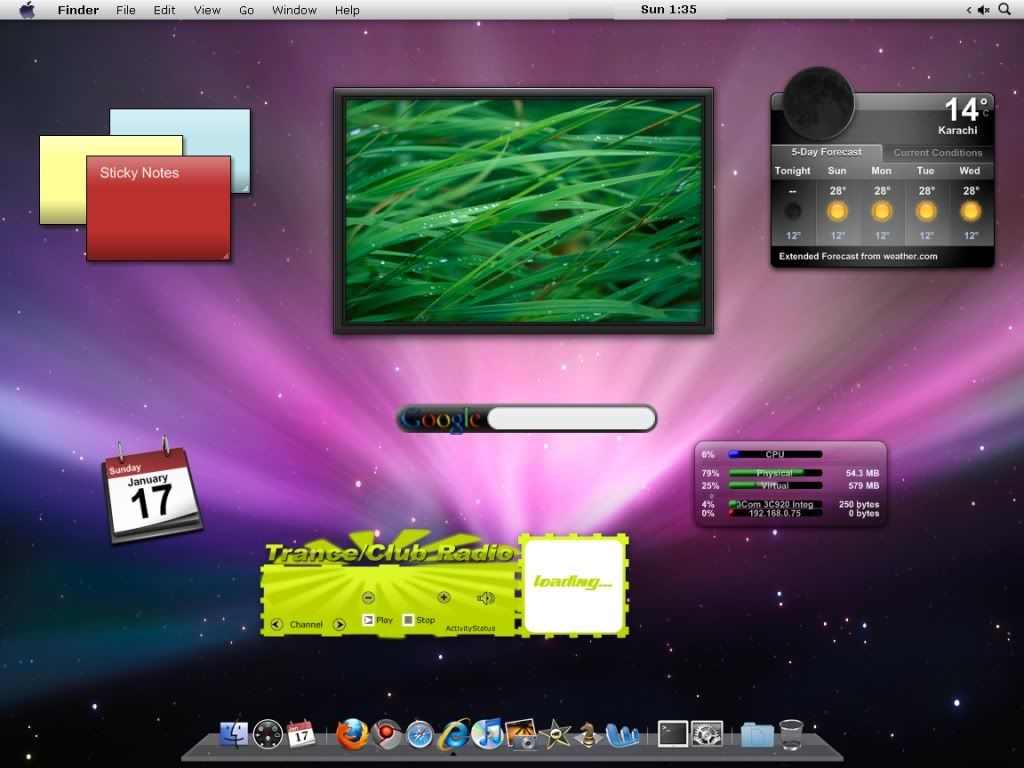
MAC DESKTOP WIDGETS
Yahoo Desktop Widgets is quite similar to Mac OS X Desktop Widgets. Unlike Windows Sidebar, you can hide the Dock (Sidebar) and your widgets will remain opened on your desktop. Official Yahoo Widgets collection website has thousands of interesting desktop widgets which will really pimp your desktop.
MAC SKINS
Firefox Themes
Firefox for Mac
Firefox for Mac 3.5 has a beautiful appearance different from Firefox for Windows. Toolbar buttons are of white color and the menu bar is hidden. You can also change the appearance of your Firefox 3.5 to Mac’s Firefox.
Menu Hider (not required in latest version of Firefox)
-
Safari
If you don’t want to install the whole package of Safari web browser, consider installing Safari theme for Firefox.
Menu Hider (not required in latest version of Firefox)
-
Safari Skin for Firefox
Camino
Camino is a popular web browser which is only for Mac. Many Mac users love Camino. It is a Gecko based web browser, developed by Mozilla. For more information on Camino, visit its official website. Since Camino is not available for Windows, you can change the appearance of your Firefox to that of Camino.
Menu Hider (not required in latest version of Firefox)
-
Winamp Theme
iTunes Minimal
If you don’t want to install a big package of iTunes, consider installing a light-weight media player, i.e. Winamp. On Winamp, you can apply an iTunes Theme.
Windows Media Player Skin
Mac OS X theme based skins for WMP
Instructions:
1. Unzip the folder, then double click each WMP skin files;
2. Windows will automatically install them to its default folder.
iTunes Minimal Skin for WMP
iTunes Skin for Windows Media Player. Download
here
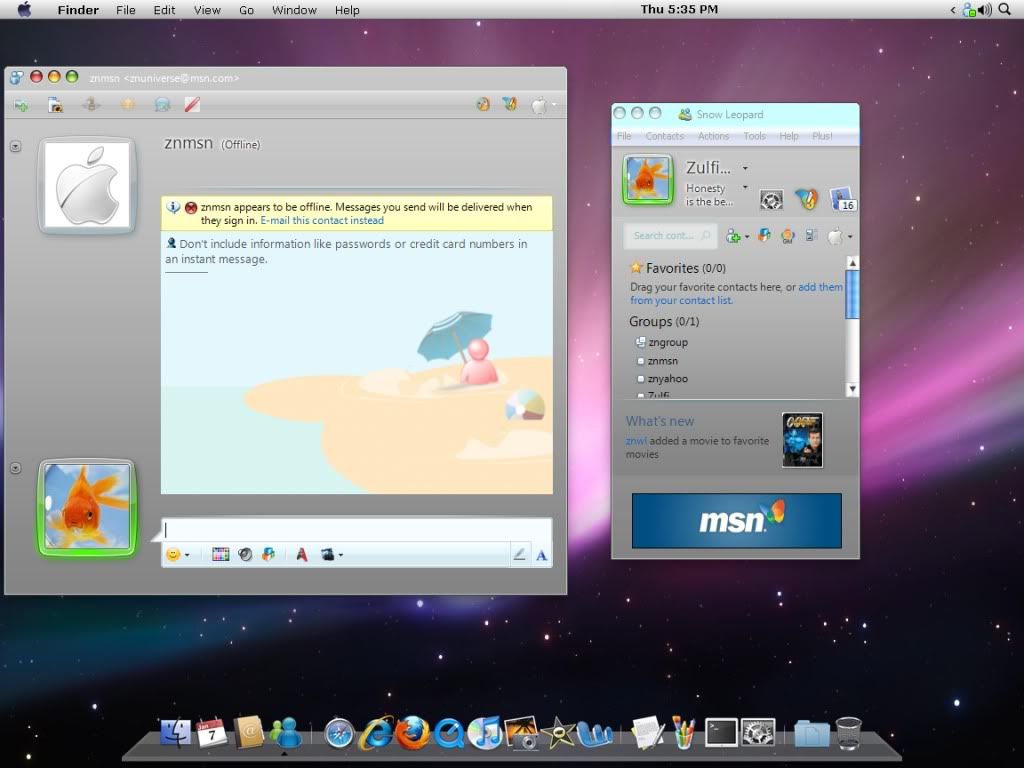
Windows Live Messenger Themes
You can install Mac Theme on Windows Live Messenger. For applying Mac Theme (and many other themes) on Windows Live Messenger, you will be needed to install Messenger Plus! Live first.
Mac OS X Snow Leopard Theme
Mac OS X Snow Leopard Skin for Firefox
SYSTEM REQUIREMENT:
Minimum:
- 1 GHz Intel or AMD Processor;
- 512 MB RAM;
- 32 MB Graphic Card Memory; and
- 10 GB HDD.
Recommended:
- 2 GHz Intel or AMD Processor;
- 1 GB RAM;
- 128 MB Graphic Card Memory; and
- 40 GB HDD.
VERY IMPORTANT NOTE:
Since some application files might have been "patched" or "compressed" (packed) to work properly on your XP system, therefore, some "false alarm" or "false positive" may happen to some clean *.exe installers/applications /installation processes, although they are actually CLEAN & SAFE and does not pose a threat to your system. The term "false positive" is used when an Anti-Virus Software wrongly classifies an innocuous (inoffensive) file as a Virus. This incorrect detection may be due to heuristics or to an incorrect virus signature in the database of Anti-Virus. Usually some great and famous Anti-Viruses (such as Kaspersky, AVG, Norman, McAfee, etc) won't have such problem so far. If that happens to you, then simply ignore it and continue installing as it's guaranteed actually 100% safe and clean by me and other guys who are posting these applications. But again, it's still your own choice and right to decide.
thanx for visiting hope you enjoy dont forget to comment


 Note: We will be going from the top left going down